
Templates, changes and updating your store
You don’t have to start from nothing. A template gives you a working group of options to change. This page covers templates, groups of options, making changes safely, and how changes reach your store.
Updated October 2026 · Squarespace 7.1
Start from a template
A new setup opens on What are you selling?. Each template is a group of options for that kind of product, with prices you can change:
- Engraving: text, a choice of font, finishes and a gift box.
- Custom cake: sponge flavors, a message by the letter, extra candles and a photo topper.
- Bouquet: size upgrades, a vase and a card message.
- Framing: frame styles, glass upgrades and rush production.
- Monogram: initials and a thread color.
- Start blank: add your own options one by one. The group’s name is empty and ready to type (it shows “Untitled group” until you do). The kinds of option are open under Start by adding your first option. The builder doesn’t point out anything to fix until the group has an option.
A template starts with no products chosen. Under the group’s name, an orange box says Not shown on any products yet, with a Choose products button, until you pick which of your products show it. Rename, reprice, remove or add options as you like. The live preview beside them shows what customers will see.
Picked the wrong one? ← Choose a different template, above the group’s name, takes you back to What are you selling?. If you’ve changed anything, the builder asks first, and Undo brings your options back. It’s there until your options are on your store; after that, use Start over in Settings › Advanced.
Groups of options for different products
Options come in groupsThe options that show together on a product, like engraving text, a font and a gift box. The Options tab lists them under Groups of options; each group shows on the products you choose.. Each group shows on Products I choose, Products with a tag, Products in a category or All products. You pick under its name, with Choose products, or Change once some are chosen. Tags and categories are the labels you give products in Squarespace. Choosing All products switches at once. If you had picked products, tags or categories, the message “Now shown on all products.” has Undo to bring them back. After your store is checked, the builder says when a group shows on no product of your store, for example a tag no product has yet. You can still add a tag, category or product page your store doesn’t list, in the box under each list. A product page you type there must be one: anything else is refused with “That isn’t a product page. Open the product on your store and copy its address.” With + Add options for other products you make another group, for example engraving for boards and a gift message for cards.
With two or more groups, the Options tab opens on a list of them, Groups of options. Each row shows the group’s name, where it shows and how many options it has. Select a row to edit it, and ← All groups of options takes you back. + Add a group of options, under the list, makes another one. Each row’s ⋯ menu has Name and heading…, Duplicate… and Delete…. In a group, select its name to rename it.
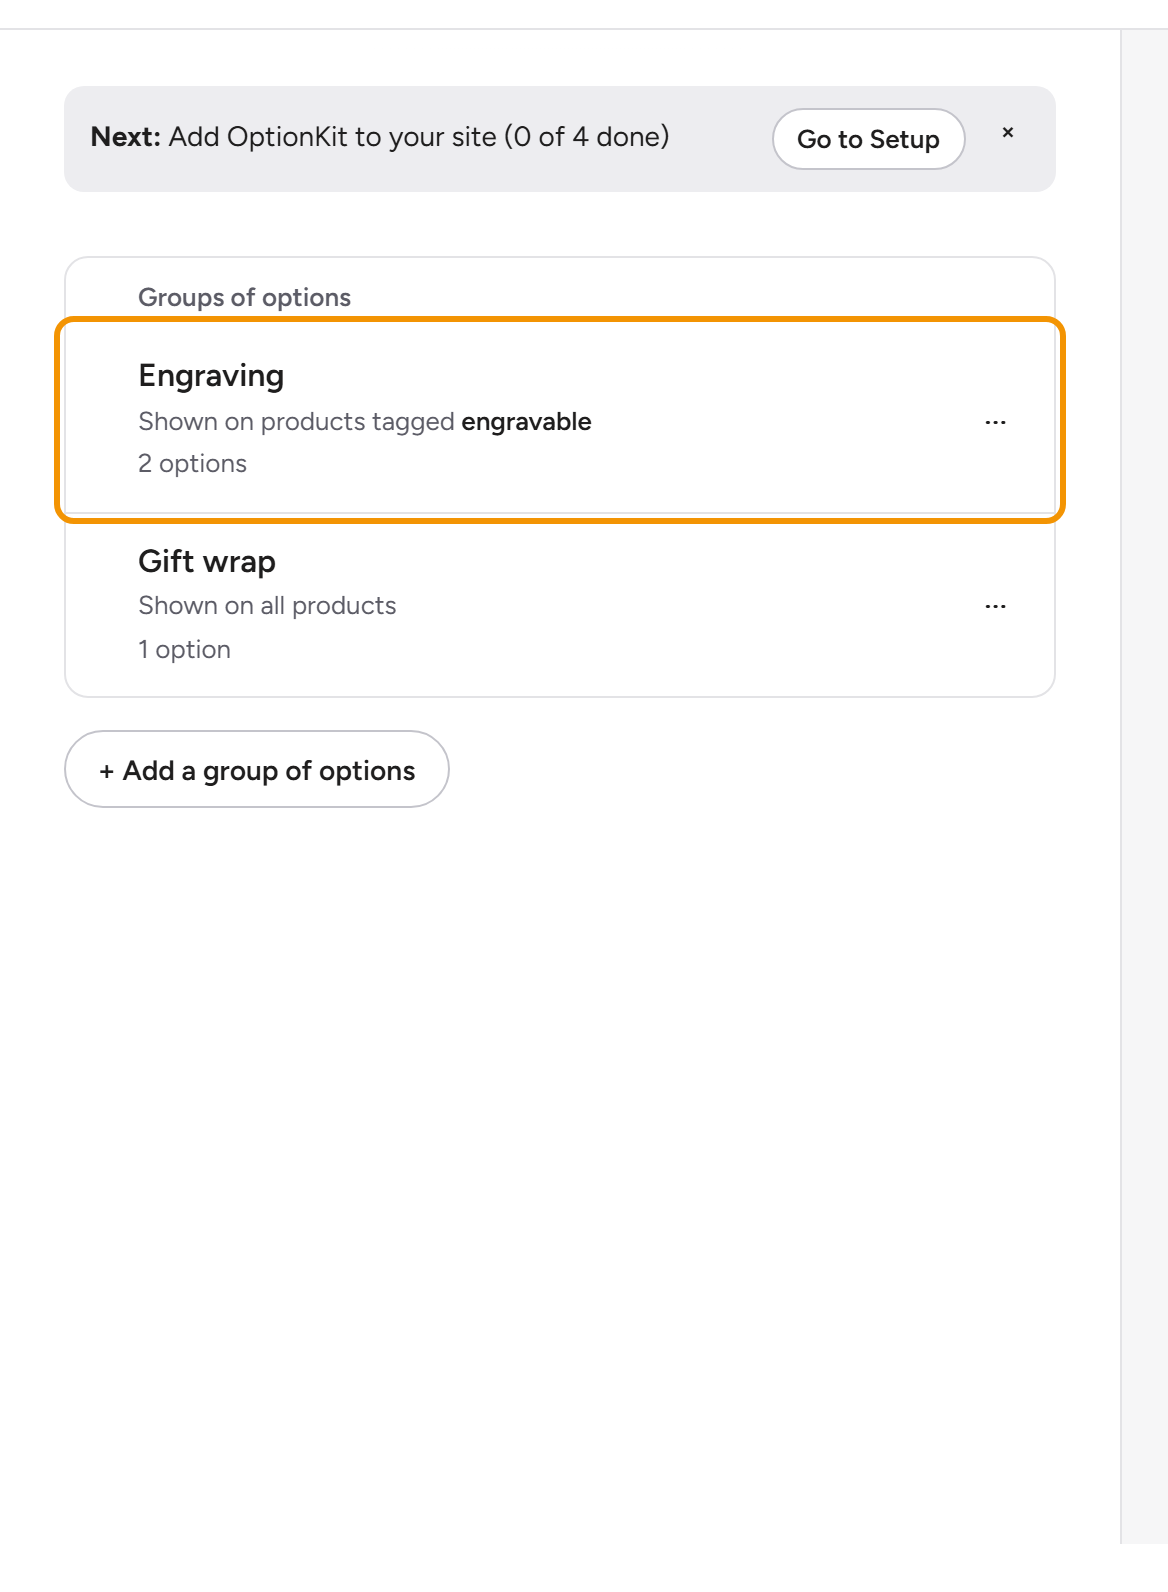
A group’s menu can duplicate it. With paid options in the group, Duplicate asks: “This group has 5 paid options. Should the copy’s prices stay linked to the original?” Shared prices keeps one price for both groups; Independent prices gives the copy its own paid options (new products to add in SquarespaceThe product that charges a paid option, like “Laser engraving, $15”, on your Add-ons page. OptionKit adds it to the cart when a customer picks that option.), so its prices can differ. The copy isn’t shown on any product until you choose where.
Making changes
↶ Undo and ↷ Redo are in the top bar (Ctrl+Z and Ctrl+Shift+Z, or ⌘Z and ⌘⇧Z on a Mac). Every change goes online as you make it: the top bar says Saving…, then Saved. The draft is what you see in the builder. Offline, the top bar says Not saved online yet: your changes are kept on this device and go online once you’re back. A change that would make your setup too big to save is refused as you make it, with the reason: “That’s more than a setup can hold. Shorten the text or remove some options.” Pressing Ctrl+S (⌘S) says All changes saved. Saving never changes your store: your store changes only when you select Update.
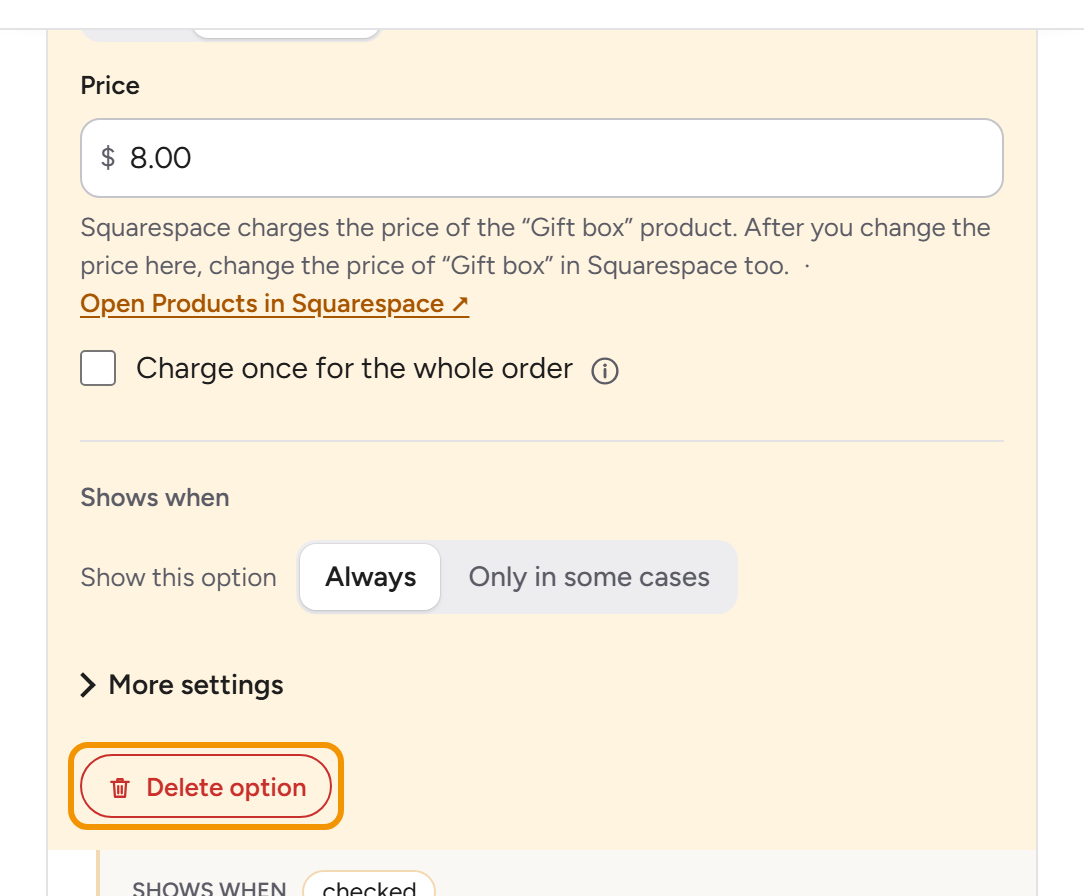
To delete an option, select the red Delete option at the bottom of the option, or Delete option in the option’s ⋯ menu. It goes at once, and the message that appears has Undo.
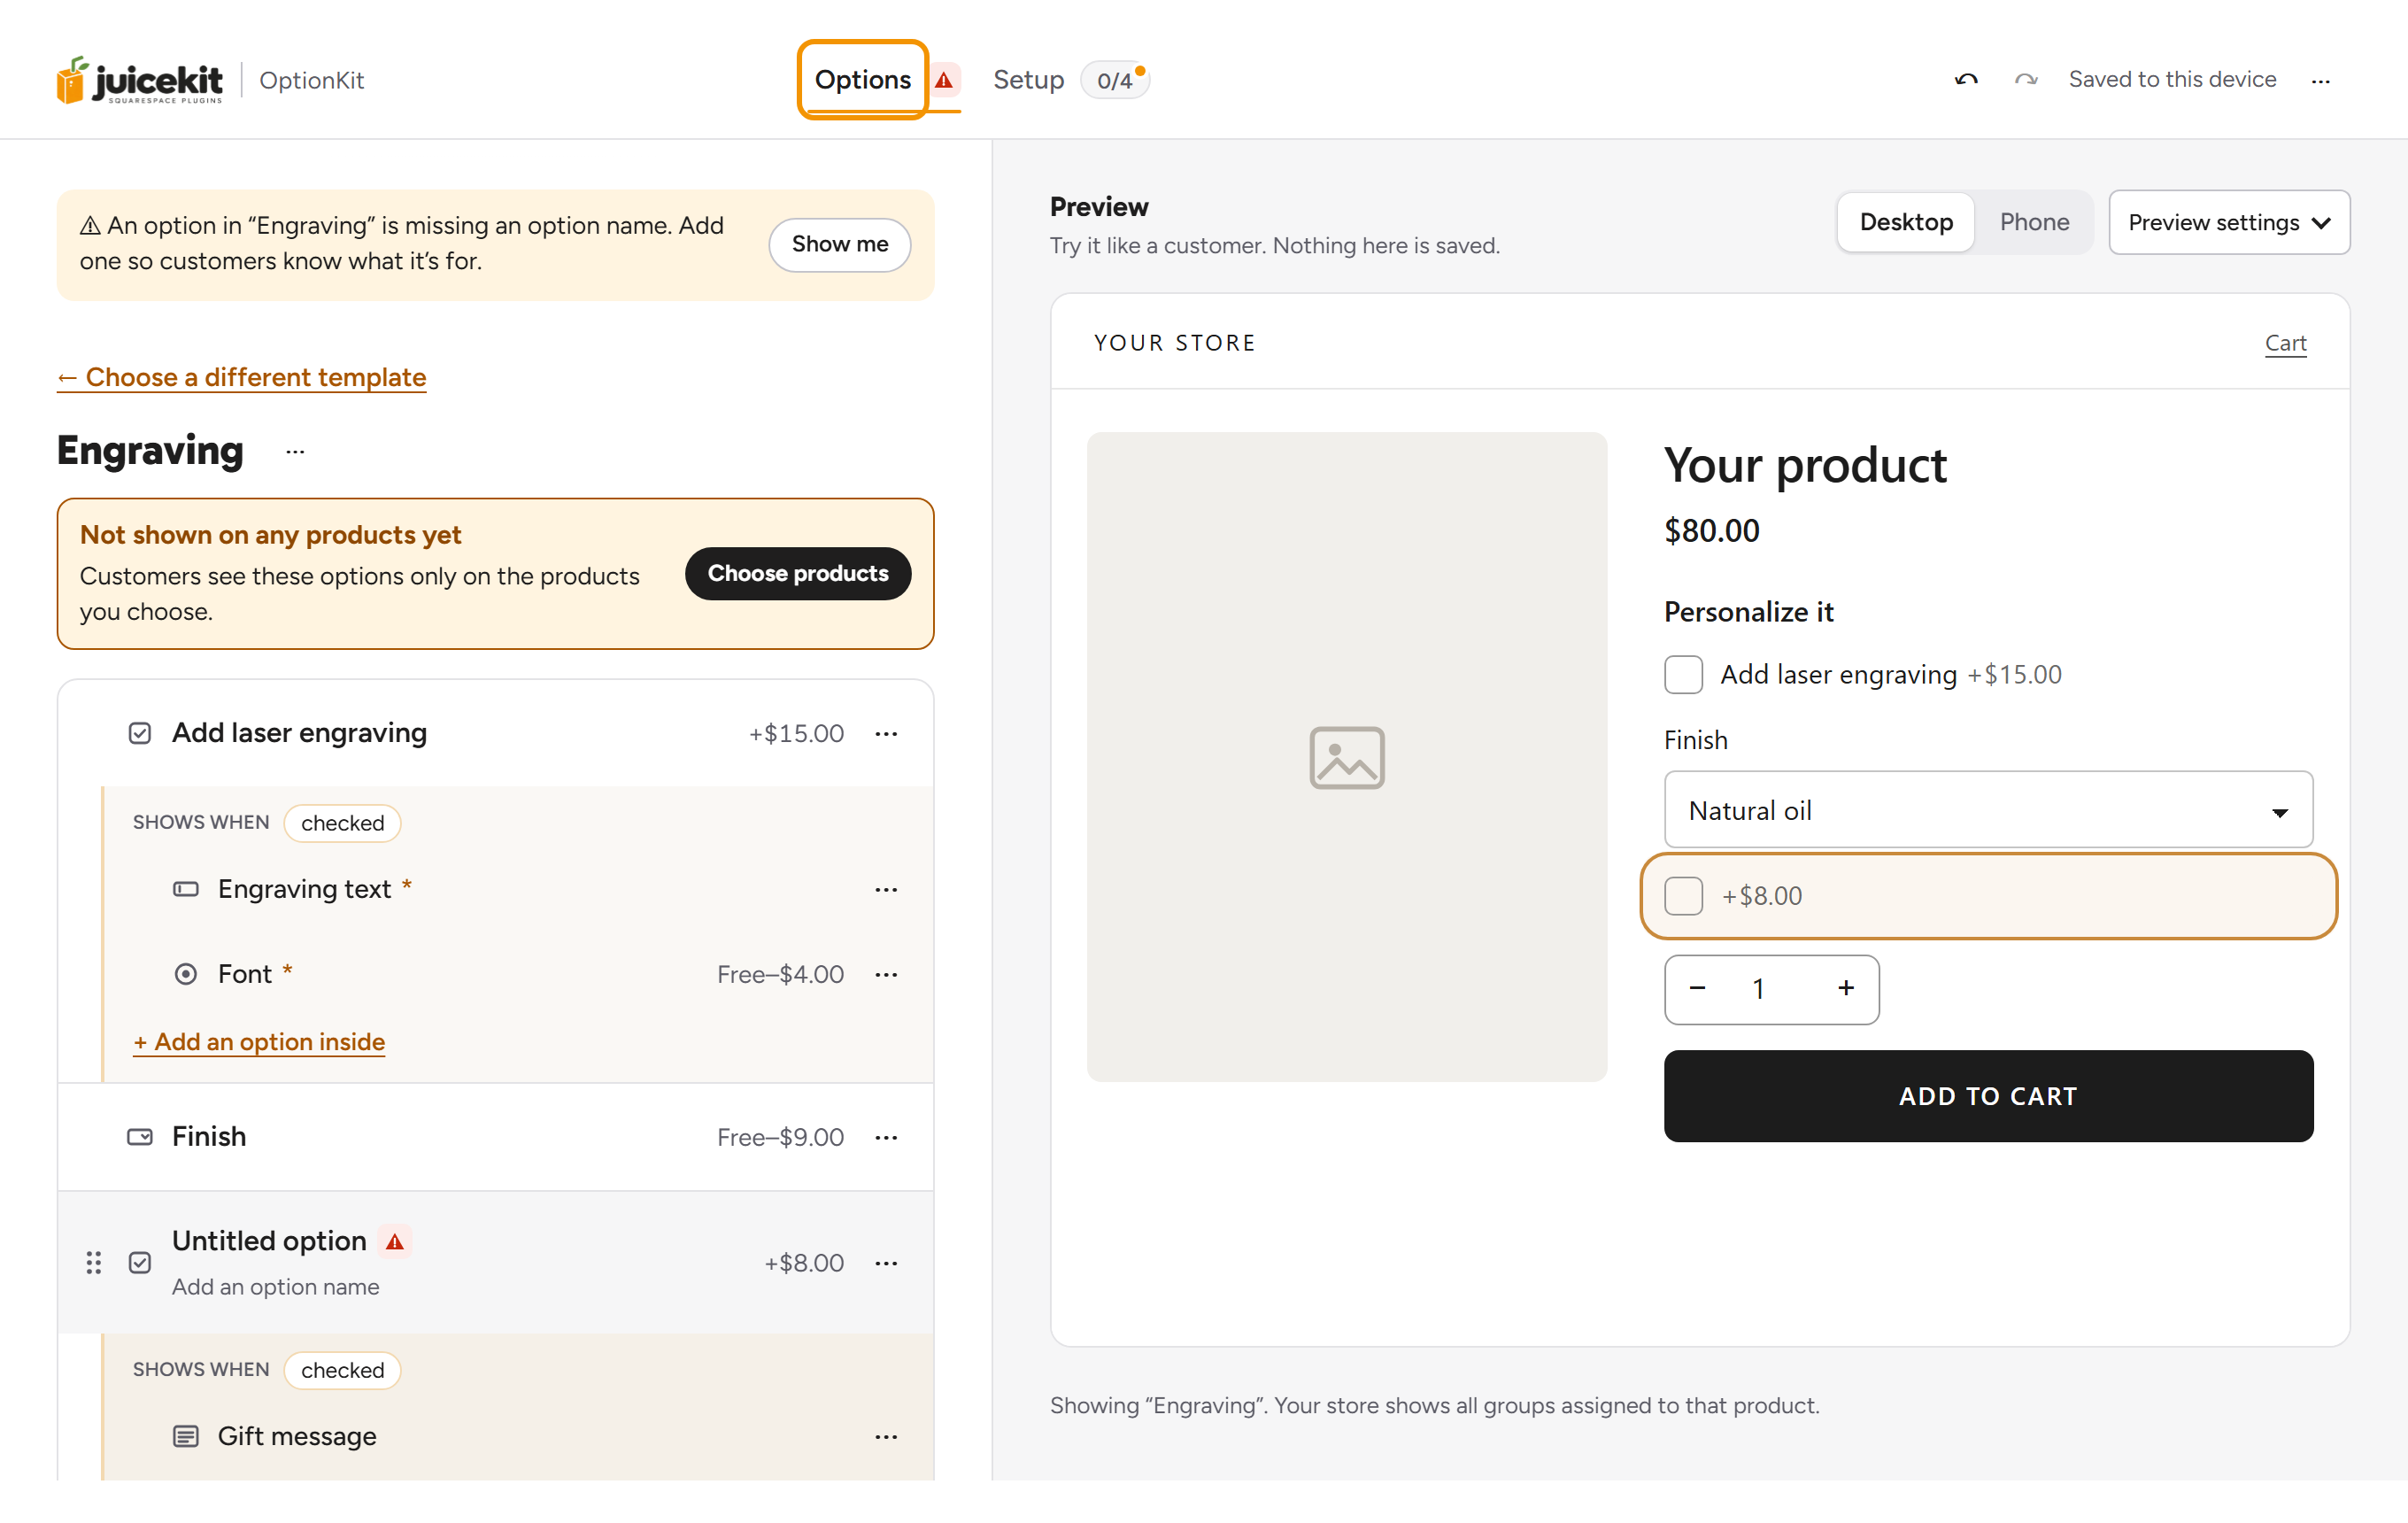
If something needs fixing before your store can be updated, the Options tab shows a small warning sign. Point at it to read what, like 1 issue: “Engraving” isn’t on any products yet, and select it to go to the first one. The note above your options says what it is. When there is more than one thing, it lists each one on its own line, and each line’s Show me takes you to it.
The option with the problem has the same warning sign after its name in the list. When the option is open, the box that needs fixing has the sign beside its name too. Point at a sign, select it or reach it with the Tab key to read what’s wrong, like An option in “Engraving” is missing an option name. Add one so customers know what it’s for.
Open the builder in a second tab and that tab is read-only, so two tabs never overwrite each other. A bar at the top says This tab is read-only. Make your changes in the first tab, or select Edit here instead to edit in this one.
A builder you open from the sign-in email, from another JuiceKit email or from Log in on the website is ready to edit straight away. The tab that was already open becomes read-only instead.
Nothing you change in the builder reaches your store until you update it. So you can try things out, look at the preview, and only then put them on your store.
Updating your store
Select PublishThe builder button that puts your options on your store the first time. It’s step 4 of the Setup guide and the top bar’s button, greyed out until steps 1 to 3 are done. in the top bar the first time, on either tab; it says Published. OptionKit is running on yourstore.com., and from then on the button says UpdateThe builder button that puts your latest options on your store, after your first Publish. It’s grayed out when your store is already up to date.. Publish is greyed out until Setup’s steps 1 to 3 are done and says which step is left, like Finish step 3 first, then publish. Select Update while step 3 is unfinished, say a new paid option isn’t in Squarespace yet, and the builder asks ⚠ Update before setup is finished? with “Some paid options aren’t in Squarespace yet. Customers will see them as Unavailable.”, Go to step 3 and Update anyway. After an update the builder checks your store by itself, and step 4 of the Setup guide says ✓ Live on yourstore.com. (Step 2 itself is marked done as soon as every group of options has its products, a tag, a category or All products chosen. It doesn’t wait for an update.)
When your store is up to date, Update is grayed out. Point at it to see when your store was last updated, like Oct 3, 5:42 PM.
If something needs fixing when you select Update, the builder opens the first problem. A bar says how many there are, like “2 things to fix before updating your store”, and where you are, like Problem 1 of 2. Previous and Next go through them. Fix them, then select Update again.
Closing the tab with changes that aren’t on your store yet? Your browser asks Leave site? first, so you don’t forget to update your store.
If you changed a price or added a priced option, the store needs a matching product for it too (its product in SquarespaceThe product that charges a paid option, like “Laser engraving, $15”, on your Add-ons page. OptionKit adds it to the cart when a customer picks that option.). Step 3 of the Setup guide says so (“1 new paid option to import”): download the import file again and import it. The step checks your store again when you come back to the builder. Connected with Squarespace, OptionKit adds the new product for you.
Your store’s address, at the top left of the top bar, opens your store in a new tab: what customers see now, after your last update.
Putting an earlier version back
⋯ › Version history opens Update history for yourstore.com: your last 20 published versions. Each row says when and how much, like “Today, 2:14 PM · 1 group of options, 6 options”. The one your store shows now says On your store now. Choose one and select Restore this version. The builder asks first, naming your store and the date: “This immediately replaces your store’s options and the setup in the builder. Undo restores the builder’s previous setup only.” Select Restore version, and it says “The version from Oct 2, 4:10 PM is back on yourstore.com.” Your store shows it again within about a minute. Squarespace’s prices go back too, when your store is connected to Squarespace. Edit this version (on the version marked “On your store now”) opens it in the builder without changing your store, for example after Start over. If the list can’t load, select Try again.
Settings
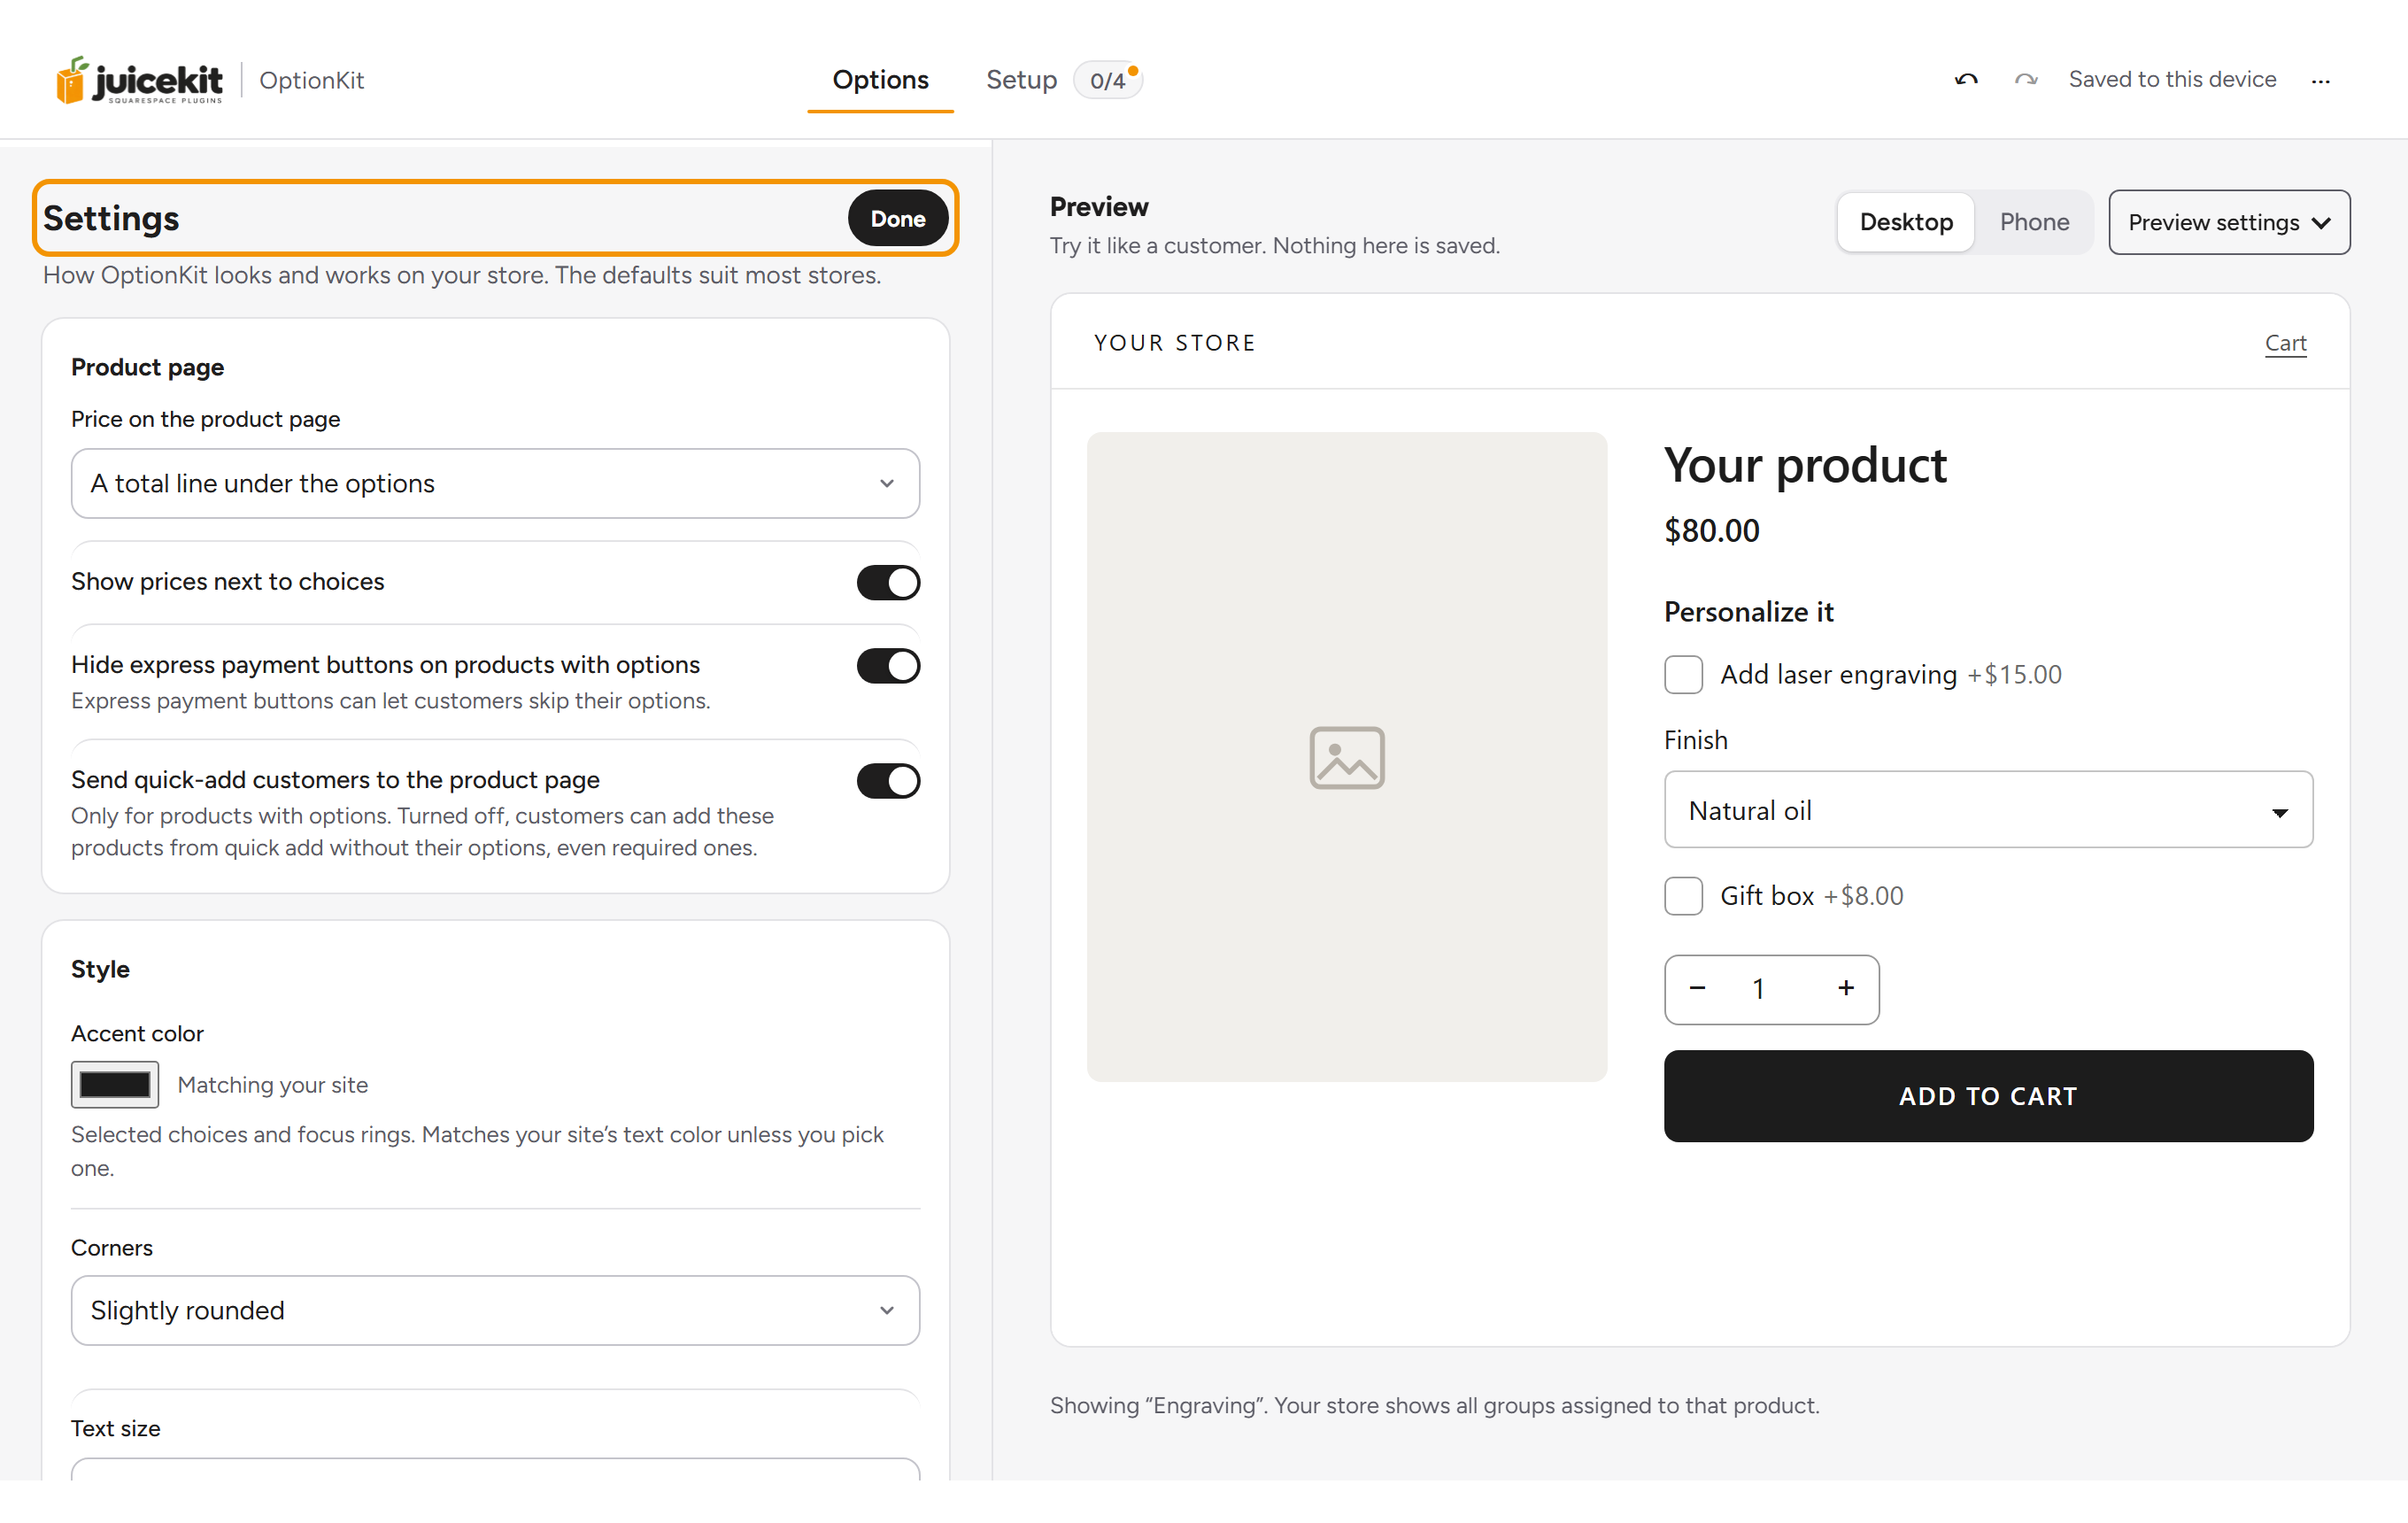
Settings is in the ⋯ (three dots) menu. Its settings are white cards: Product page, Style, Cart, Store, Subscription (one line, with Manage), Wording, Builder colors and Advanced. On a computer it opens beside the live preview, in place of your options, so you see each change on the product page at once. On a phone it fills the screen. Select Done to go back to your options.
Under Wording, Words customers see changes the words OptionKit shows customers. They’re grouped by where customers see them: Product page, File upload, Cart and Order details. Each one shows an example, like “Engraving text: please fill this in.” To find one, type a word in Find a wording.
Send quick-add customers to the product page is on to start with. Turned off, customers can add these products from quick add without their options, even required ones.
Back up and import a setup
In Settings › Advanced, Back up… saves your whole setup as a file: select Download backup. The file is named for your store, like yourstore-com-optionkit-backup-2026-10-04.json. Keep it, or open it on another computer. The dialog says “This file holds your setup, not your store’s connection. To update your store from another computer, sign in there.” Show details shows what’s in it.
Import a setup… says “Open a backup file from another computer, or paste the code of an older OptionKit install.” Choose a file, or drag it into the box. Import brings the file’s options and settings; your store’s website, products, links, currency and Add-ons page stay as they are. Your site code itself isn’t a setup: the builder says so and where to open your store instead. A setup bigger than 256 KB can’t go on a store, and Import says so before it loads. Importing replaces what’s in the builder, so back up first if you want to keep it. On the first screen, Already have a backup? Open it. under the templates opens the same dialog.
Questions
I changed something on my store by mistake. How do I go back?
Open ⋯ › Version history, choose the version from before the change, and select Restore this version, then Restore version. The builder asks first, so nothing changes by a slip.
Can I start again from scratch?
Yes: Settings › Advanced › Start over asks Clear this store’s options or Set up another store. Clear this store’s options clears every group of options and their prices and keeps your store connected; your settings stay, and nothing changes on your store until you select Update. Set up another store starts a blank setup with no store connected; your first store keeps its options and its work, saved online. Cancel closes it without changing anything. Either way the builder then opens What are you selling?. To go back to the first store, select Open yourstore.com again in the message that appears right after, or open it from Your stores… in your account menu.
Can I open my setup on another computer?
Yes. Sign in with your email in the builder on the other computer, and your store opens with your latest work. To take only the options, make a backup in Settings › Advanced and import it on the other computer.
Your work is one draft, online, so two computers never keep two versions. When your setup was changed somewhere else too, on another computer, in another tab or by an update from there, one bar says “Your setup was updated elsewhere.” with Load it. Your work here waits, kept, until you select it. Undo then brings yours back.