
Get started with OptionKit
About half an hour. You’ll need your Squarespace site open in another tab.
Setting up · part 1 of 4
Updated October 2026 · Squarespace 7.1
Before you start
- You need a Squarespace 7.1 site with a store. (7.1Squarespace’s two site versions. OptionKit works on 7.1, which nearly all newer sites use. is the newer of Squarespace’s two site versions. Nearly all newer sites use it.)
- You can build and test on a trial siteA Squarespace site that hasn’t been paid for yet. It’s private and can’t take payments. (a Squarespace site that hasn’t been paid for yet).
- OptionKit needs a Squarespace plan with Code Injection: Core, Plus or Advanced, or an older Business or Commerce plan. The Basic plan doesn’t have Code Injection.
- Taking orders needs a Squarespace plan with checkout, as for any store.
- OptionKit is free on your site’s squarespace.com addressThe free web address Squarespace gives every site, like yourstore.squarespace.com. Squarespace calls it your built-in domain.. So you can do everything below before you buy.
- On your own domainA web address you bought, like yourstore.com. you get a 14-day free trial, no card needed. Then it’s a subscription: Billing and your subscription.
1. Open the builder
Open the OptionKit builder. The builderThe OptionKit web page where you create your options and see a live preview. It has two tabs: Options, where you build, and Setup, with the Setup guide for putting OptionKit on your store. is the web page where you create your options and see a live preview. It has two tabs: Options, where you build, and Setup, where you put your options on your store. You can try everything on the Options tab before you connect your store.
2. Build beside the live preview
- Pick what you’re selling. Choose a template, such as Engraving or Custom cake, or choose Start blank. The template’s options appear on the left. On the right is a product page that shows them. Already have a backup file from another computer? Under the templates, Already have a backup? Open it. opens it.
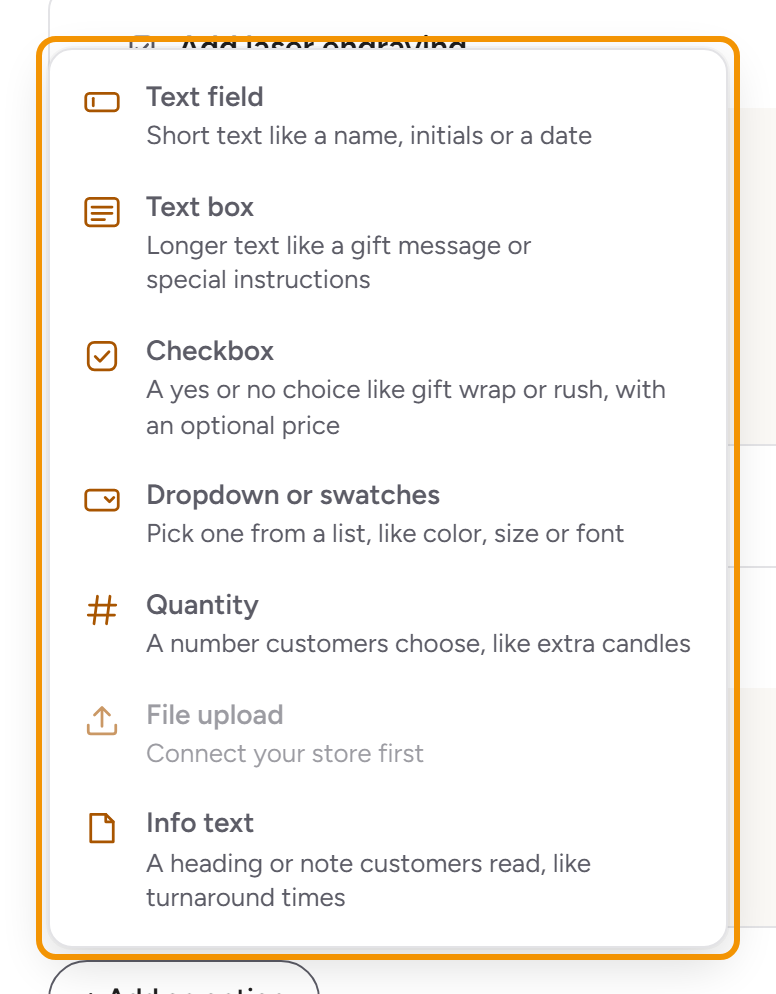
- Select an option to change its name, price, help text and limits. + Add an option opens a menu with each kind: Text field, Text box, Checkbox, Dropdown or swatches (swatches are small circles of color), Quantity, File upload (customers attach a photo, a logo or a PDF; it needs your store connected) and Info text. A new option starts with no name: its row says Add an option name until you type one in Option name, and the kind’s example shows in grey.
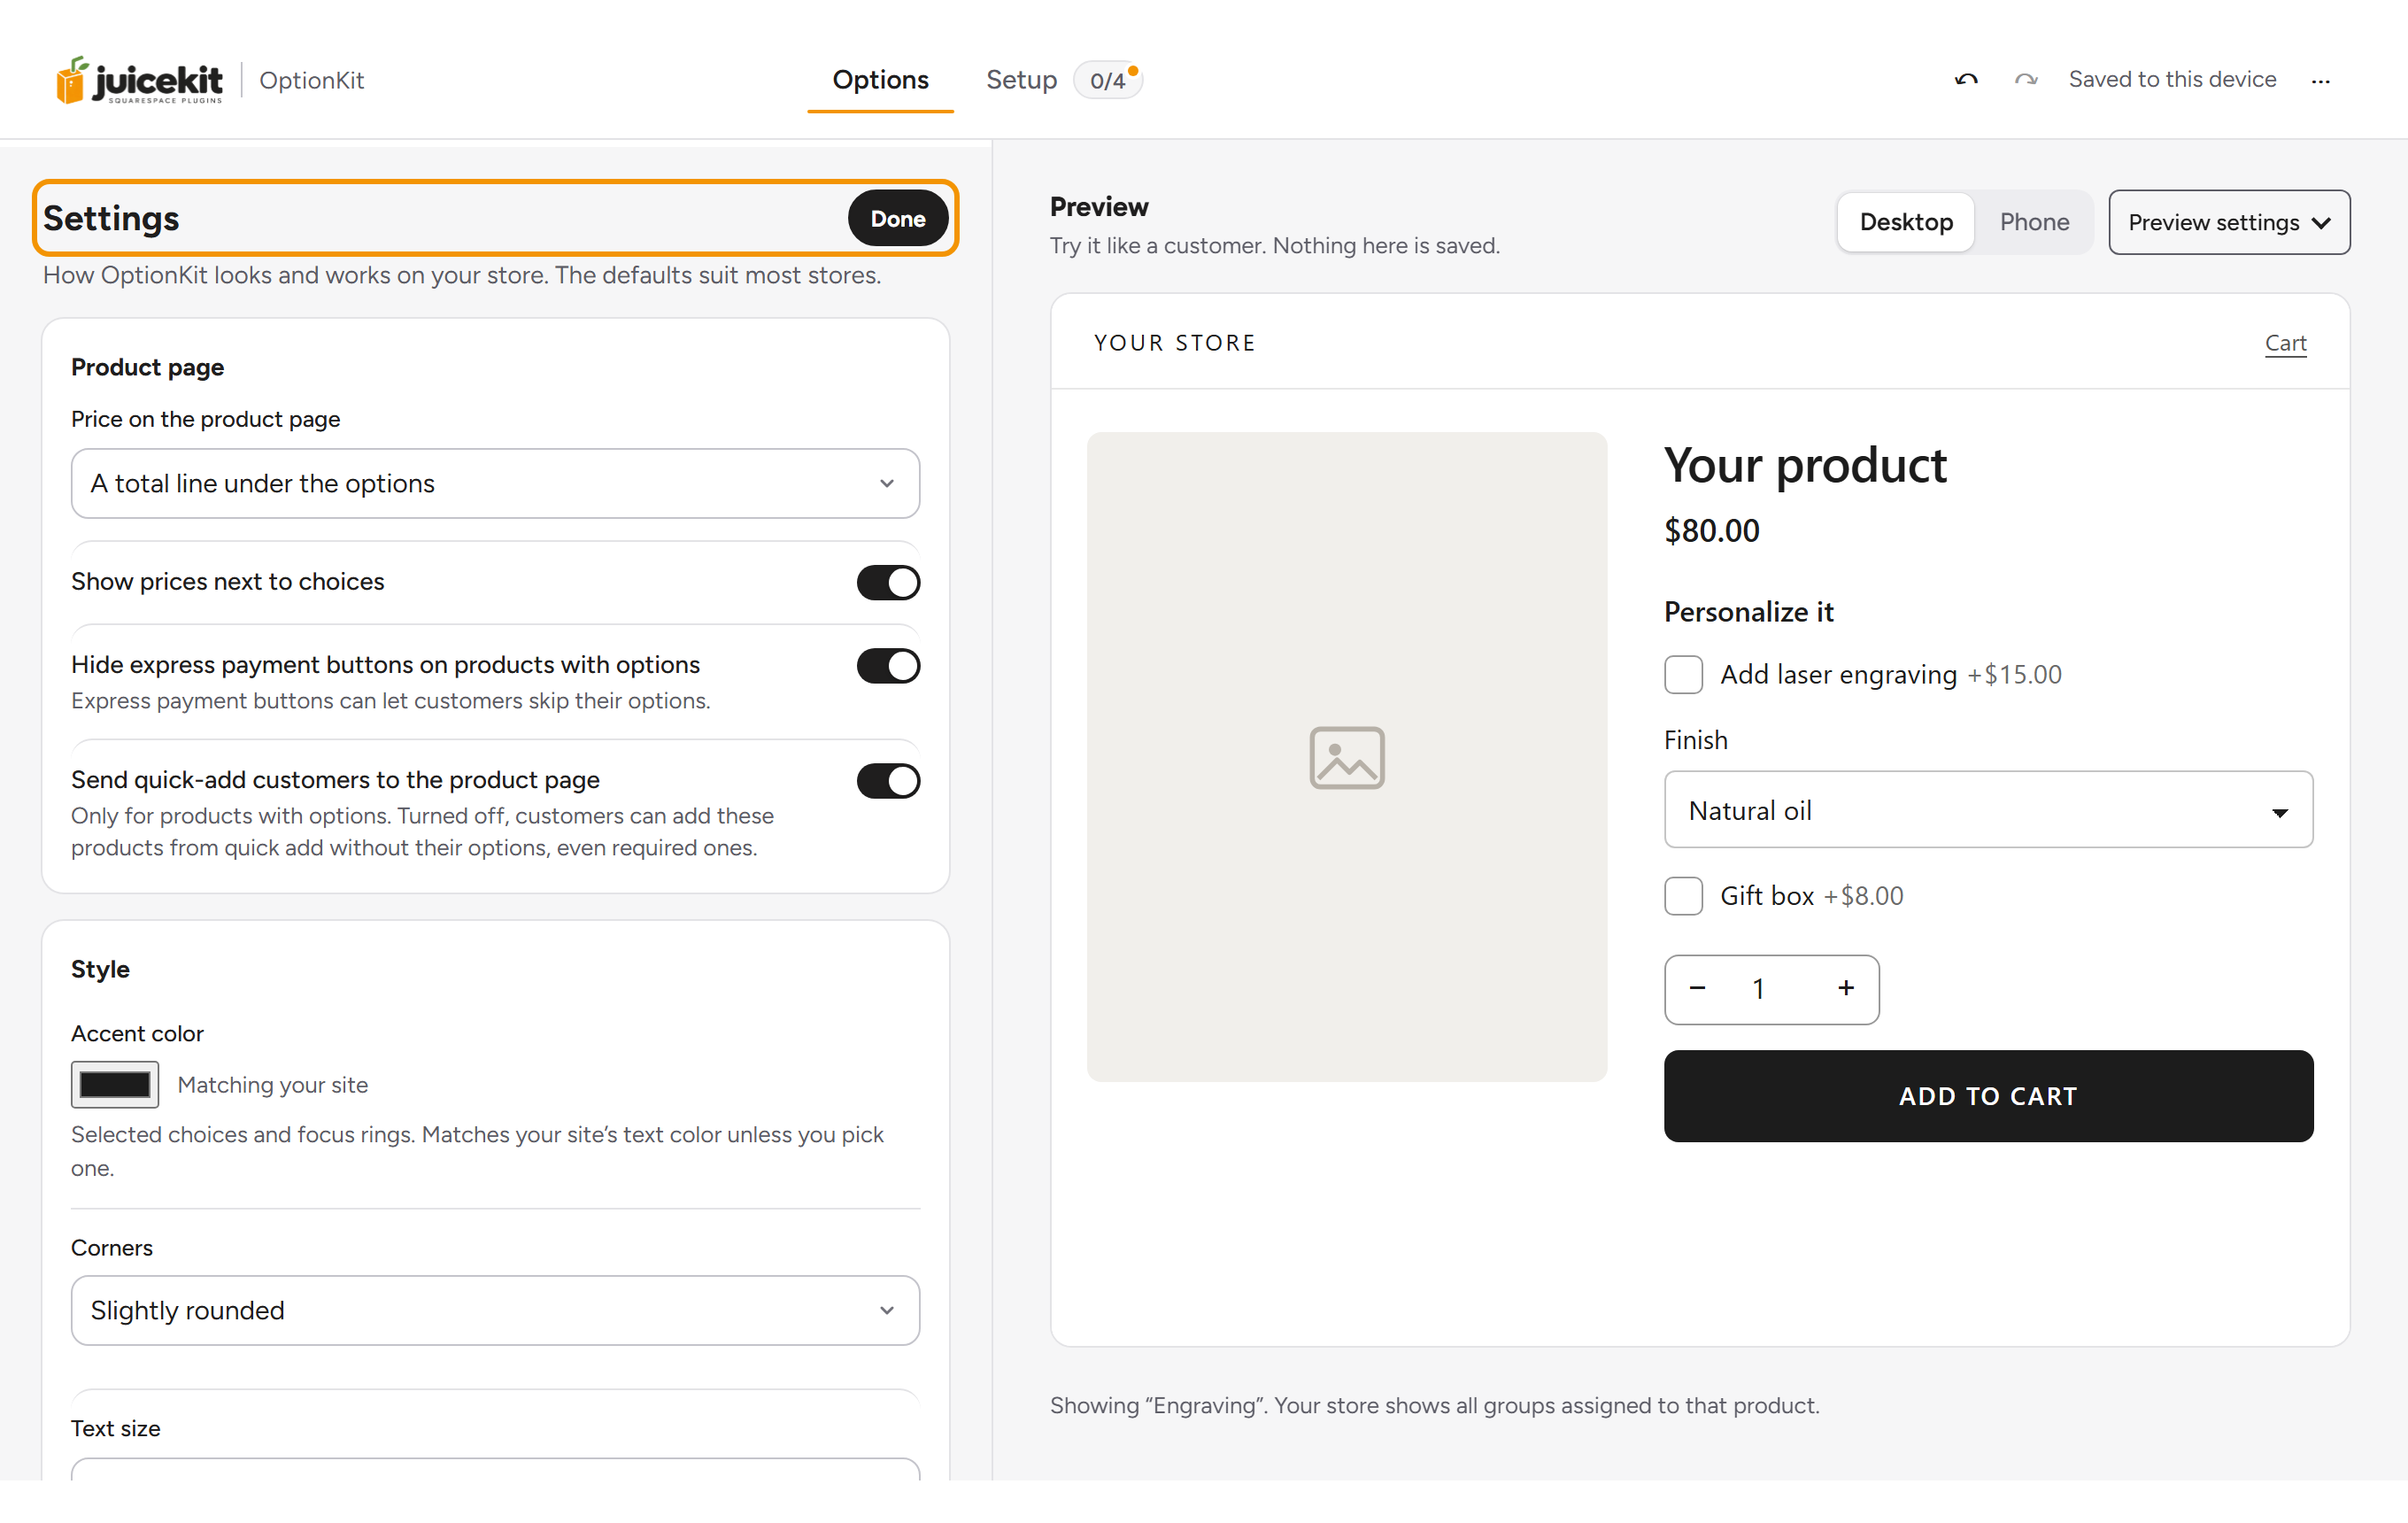
- Try the preview like a customer. Check, type and pick, and watch the total. Nothing in the preview is saved. Once your store is connected, Preview settings › Preview on picks which of your own products the preview shows, with its name, price and photo. Until then the preview shows a placeholder, “Your product”.
- Your options are in a groupThe options that show together on a product, like engraving text, a font and a gift box. The Options tab lists them under Groups of options; each group shows on the products you choose.. To choose which products show them, select Choose products under the group’s name. Once some are chosen, it says Change. Under Show these options on, choose Products I choose (select Browse products and check them in your store’s list), Products with a tag, Products in a category (see tags and categoriesLabels you give products in Squarespace, under Products › Organization, so you can group them. A category shows in your shop, a tag usually doesn’t.) or All products. A template’s group starts with no products chosen, so an orange box under its name says Not shown on any products yet, with a Choose products button, until you pick some. Your store’s products, tags and categories are listed there once step 1 of the Setup guide is done. If no product in your store has the tag you chose, the group says so, like “We didn’t find a product with the tag compass in your store, so these options may not show anywhere.”
- Settings changes how OptionKit looks and behaves on your store. It’s in the ⋯ menu. On a computer it opens beside the live preview, in place of your options, so you see each change on the product page at once. On a phone it fills the screen. Select Done to go back to your options.
3. Connect your store
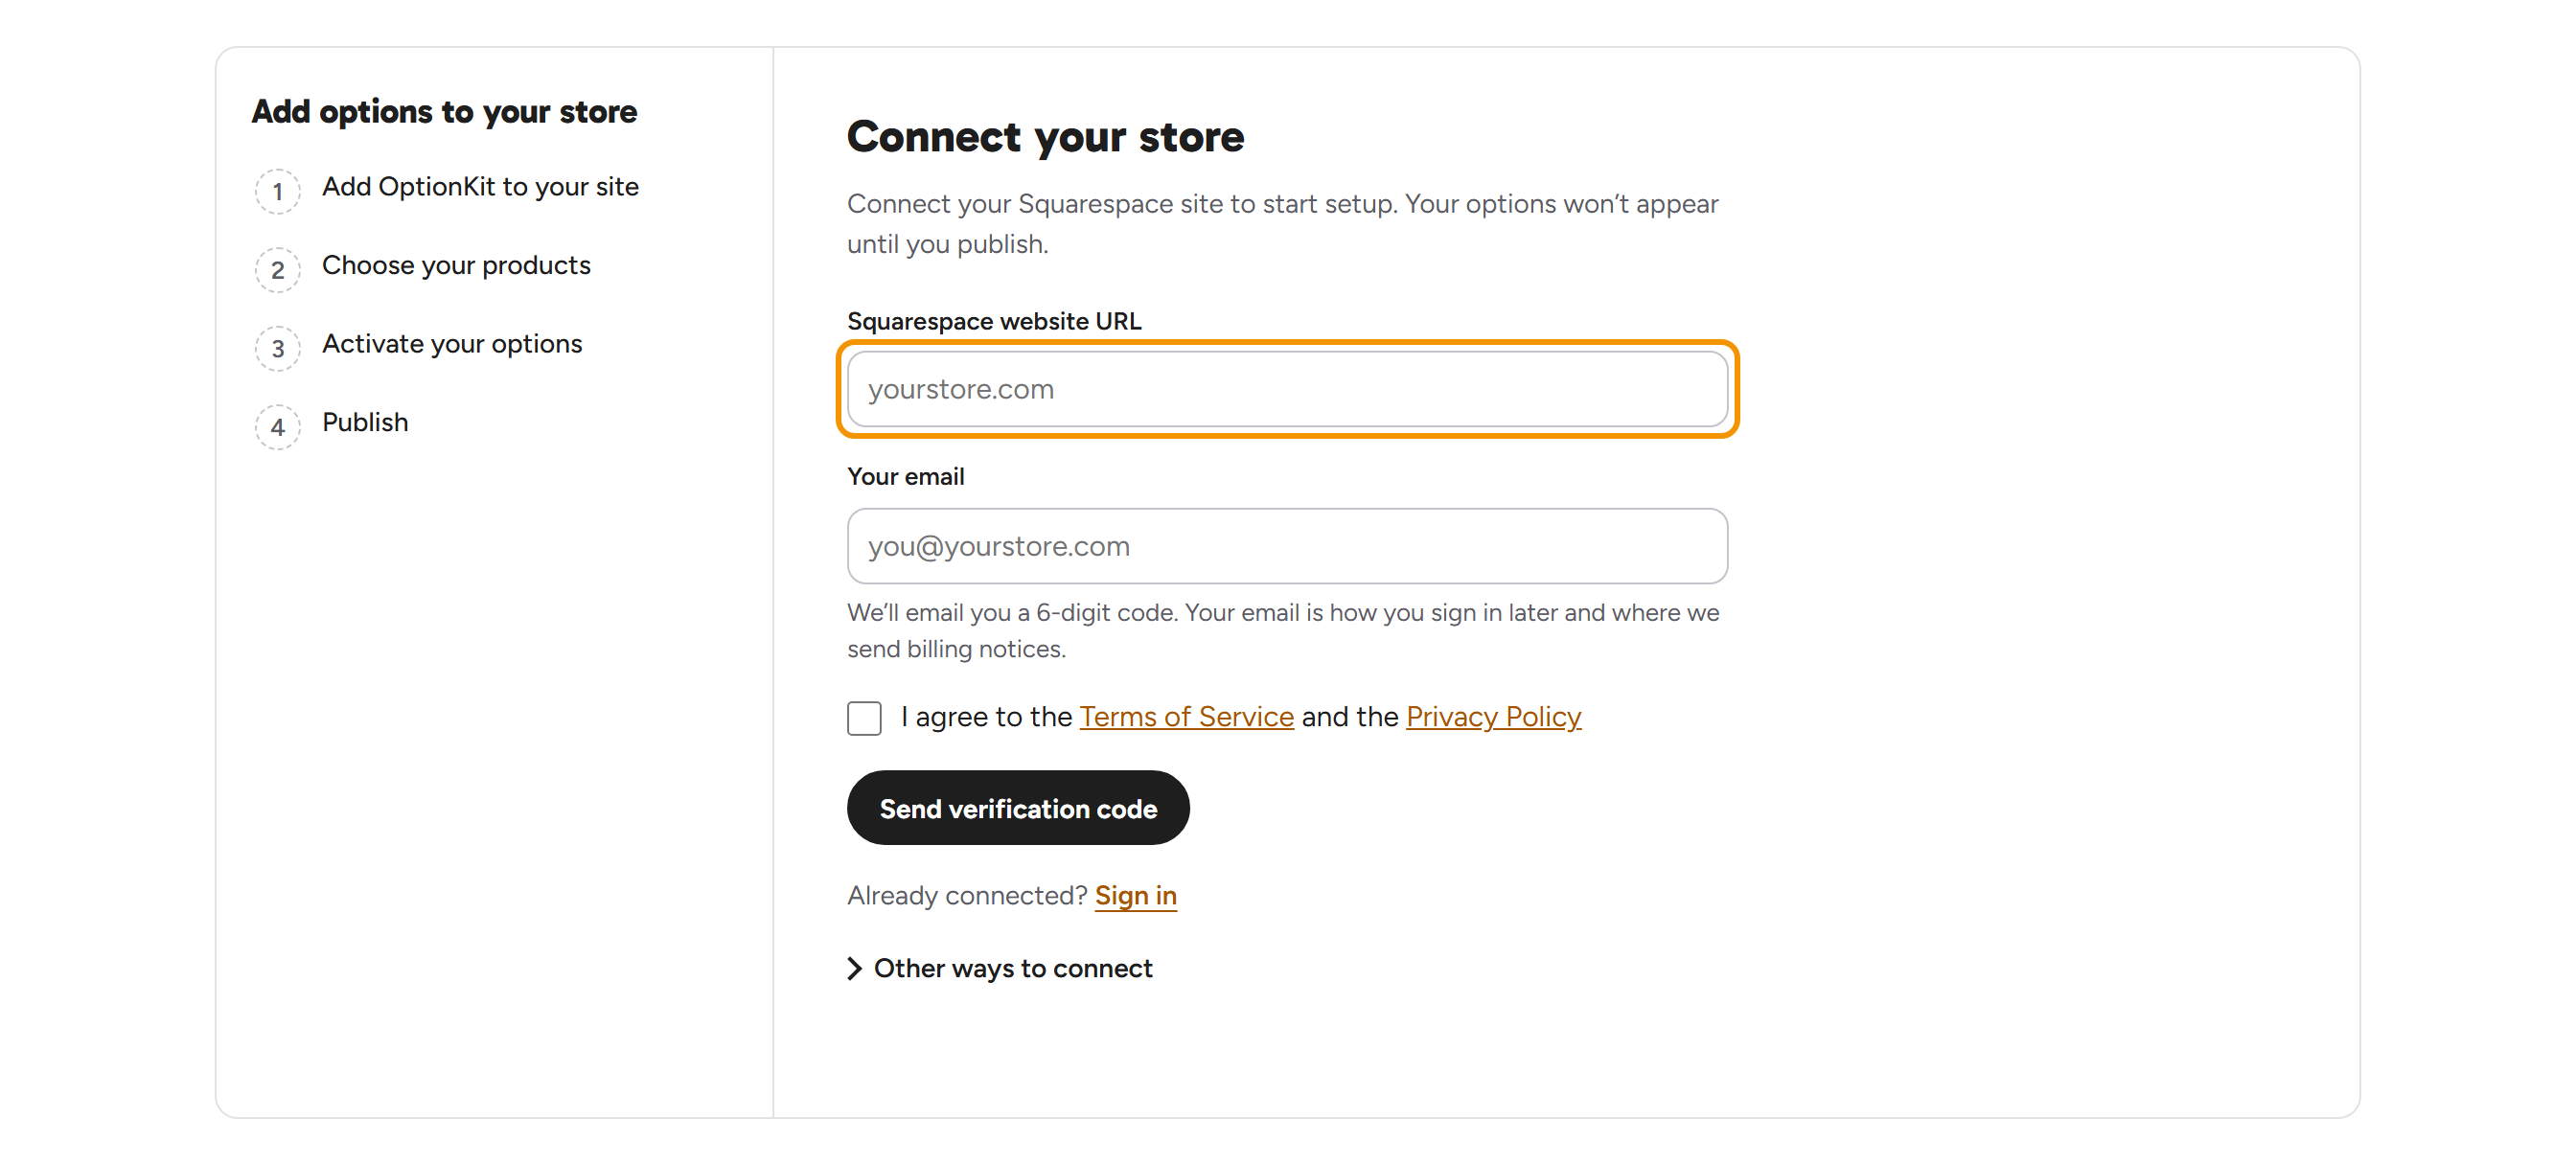
Open the Setup tab. It lists the four steps on the left, under Add options to your store. On the right, under Connect your store, a grey line says “Connect your Squarespace site to start setup. Your options won’t appear until you publish.”
- Enter your Squarespace website URL. That’s your own domain if you have one, like
www.yourstore.com. Otherwise it’s your squarespace.com address, likeyourstore.squarespace.com. You can paste it as it is, with https:// or www. If that address is already connected, or already a store on your account, the builder says so right under the field and offers what to do. - Enter Your email. Under it the builder says what the email is for: “We’ll email you a 6-digit code. Your email is how you sign in later and where we send billing notices.” Check I agree to the Terms of Service and the Privacy Policy and select Send verification code. If a field is missing or not right, the builder says what under that field.
- Open the email and select Sign in to OptionKit in the same browser as the builder: the store connects with nothing to type. Reading the email on another device? Under Check your email, type the 6-digit code from the email into the six boxes and select Continue instead. The link and the code can be used once and expire in 15 minutes. Resend code sends a new one after 30 seconds, and Use a different email goes back. Your email is now your sign-in. (Already signed in? Then there’s no code, and the button says Connect.) The builder then opens your store straight away.
Set up this store before? Already connected? Sign in, under the button, opens your stores. A backup made on another computer opens from the ⋯ menu, Open a backup file….
Once your store is connected, its website can’t be changed in the builder. Typed the wrong store, or setting up a second one? Wrong store? in step 1 opens Is this a different store?, where you can set up a new store with these options or from scratch. Set up a new store with these options keeps your options, prices and settings, and asks again which products each group is shown on. Moved your store to your own domain? Setup offers to save it when it finds your store there.
Not ready yet? Select the Options tab at the top of the builder. Your options and the preview keep working.
A website belongs to one account. Typing a website that is already set up with another email says so, like “yourstore.com is already set up by m•••@gmail.com. Sign in with that email, or ask them to transfer the store to you.”, with Email us for when it isn’t theirs. To hand a store over, open your account menu › Your stores… › ⋯ › Transfer to another email…. The other person gets one email with Accept the transfer; until they accept, the row says Invitation sent with Cancel invitation, and the store stays yours. They accept in their own Your stores, and the store opens on their account. Nothing on the store changes, so nothing is pasted again.
4. Follow the Setup guide
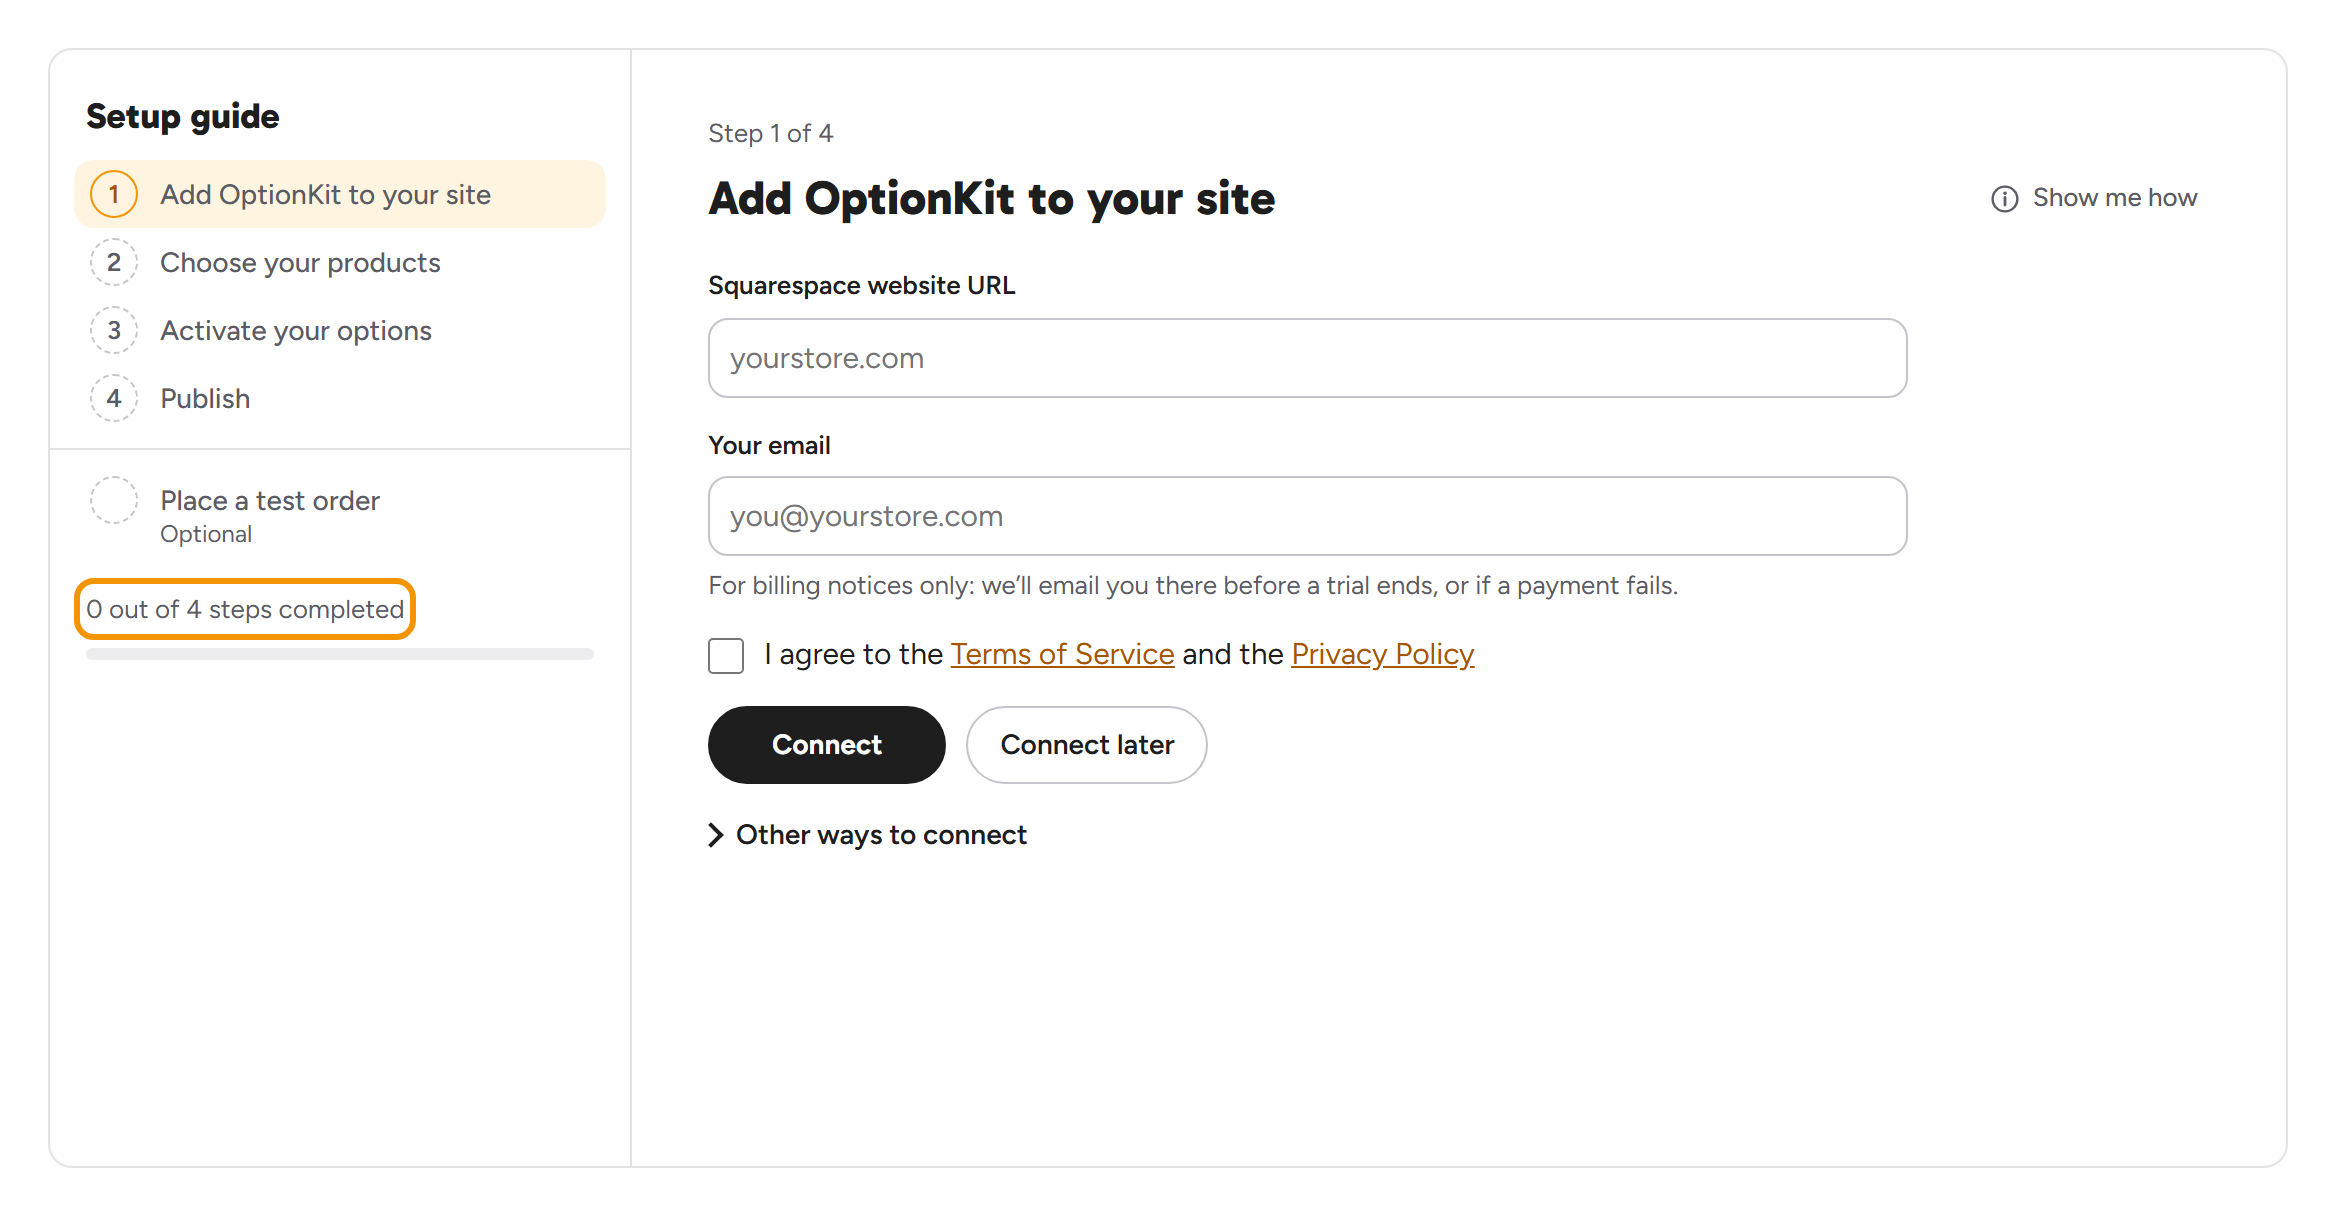
Then the Setup tab shows the Setup guide. It says how far you are, like 1 out of 4 steps completed. Do the steps in order:
- Add OptionKit to your site. Select Copy code to copy your site codeThe short code you copy from step 1 of the Setup guide and paste into Code Injection, once. It switches OptionKit on for your store.. Select Code Injection ↗ in the step, which opens your site’s Code InjectionA box in Squarespace’s settings where you paste code that runs on every page of your site. in Squarespace. Paste the code at the end of the Footer box and select Save. Come back to the builder: the step says ✓ On yourstore.com once your site has loaded the code. More: Add OptionKit with Code Injection.
- Choose your products. Select Choose products. It opens the Options tab on the first group with no products yet, with Show these options on open. Pick its products, a tag, a category or all products, as in part 2 above. The step is done once every group shows on at least one product. You don’t need to publish for that.
- Activate your options. Do its three parts, each with its own numbered steps. Create your Add-ons page in Squarespace’s Pages ↗. Create option products: select Connect with SquarespaceThe button in step 3 of the Setup guide, under Create automatically · Recommended, that lets OptionKit create the products for your paid options in Squarespace and keep their prices up to date., or open Set up manually ▾ and import the file from Download import file. Add a form to Personalization in Squarespace’s Products ↗. You’ll need to add the form manually with either setup method. Step by step: Activate your options.
- Publish. Select Publish. The first time, the builder says Published. OptionKit is running on yourstore.com. Your options are on your store within about a minute. The step says ✓ Live on yourstore.com · checked just now, and the guide ends with OptionKit is running on yourstore.com, a green Live badge, and View store ↗ and Check store under it.
Optional: place a test order. After step 4, buy something with a paid option, like Laser engraving, with a 100% off discount code, and look at the order. Then check Mark as done. More: Check your store and place a test order.
Each step checks your store by itself when you come back to the builder, and Check now in a step checks at once. A finished step gets a green ✓ and folds to its result. A step you haven’t reached says when it opens, like After step 2. On a computer the steps are listed on the left; on a phone the guide is one card whose rows open in place.
Show me how, at the right of a step’s title, opens the steps in Squarespace, one per line, with pictures. Back and Next go through them, and Done closes it.
From then on, the top bar’s button says UpdateThe builder button that puts your latest options on your store, after your first Publish. It’s grayed out when your store is already up to date.: select it after any change. After an update the builder checks your store by itself. What each step says while it waits, and what to do when a step shows something to fix: What the Setup guide says.
After that

- Working on another computer? Sign in with your email in the builder, and your store and your work are there. More about other computers and backups.
- The top bar shows your store’s address at the top left, beside OptionKit. Select it to open your store in a new tab.
- Every change goes online as you make it: the top bar says Saving…, then Saved. Before your store is connected, it says Saved to this device: the draft is only on this device until you connect. The draft is what you see in the builder. Your store doesn’t change until you select PublishThe builder button that puts your options on your store the first time. It’s step 4 of the Setup guide and the top bar’s button, greyed out until steps 1 to 3 are done. the first time, then UpdateThe builder button that puts your latest options on your store, after your first Publish. It’s grayed out when your store is already up to date., in the top bar. When there’s nothing new to send, the button is grayed out. Point at it to see when your store was last updated, like Oct 3, 5:42 PM. How changes reach your store, undo, and putting an earlier version back: Templates, changes and updating your store.
- Changed your products or your theme? Open the Setup tab: its steps check your store again when you come back to the builder, and Check now in a step checks at once.
- Need help? The ⋯ menu at the right of the top bar has Help center ↗ and Contact us: Getting help.